
Knowing how to loosen a bike pedal is essential for any bike owner. Whether you want to change pedals, repair your bike, or simply maintain it, learning this skill will save you time and money. This guide will show you how to loosen bike pedals easily and safely, even if you are new to bike repair. Follow these simple instructions to avoid common mistakes and keep your bike in top condition.
Essential Tools and Preparations for Loosening Bike Pedals
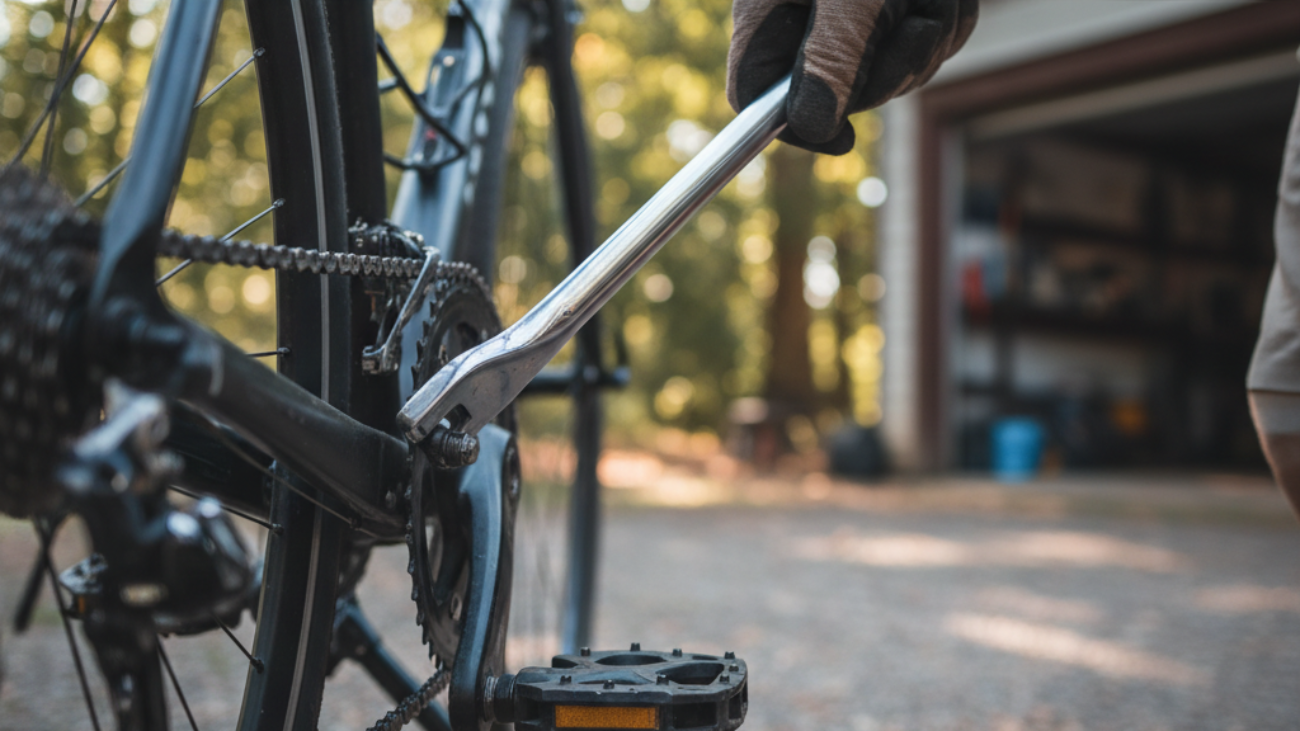
Must-Have Tools for the Job
- Pedal wrench (usually 15mm) or a regular wrench that fits
- Allen key (usually 6mm or 8mm, for some pedals)
- Penetrating oil (for stuck pedals)
- Rag or cloth (for cleaning)
- Bike stand or a sturdy way to keep your bike steady
- Protective gloves
Preparing Your Workspace and Bike for Safe Pedal Removal
- Find a flat, well-lit area to work.
- If you have a bike stand, use it to keep your bike stable.
- If not, lean the bike safely against a wall.
- Shift the bike into a low gear to move the chain away from the pedals.
- Put on protective gloves to prevent hand injuries.
- Check that you have all your tools ready before you begin.
Understanding Pedal Thread Directions and Common Pitfalls
Right vs. Left Pedal Threading Explained
- The right pedal (drive side, with chain) loosens by turning counter-clockwise.
- The left pedal (non-drive side) loosens by turning clockwise.
- This difference prevents pedals from coming loose while you ride.
Mnemonics and Memory Aids to Avoid Mistakes
- Remember: “Right is regular, left is loose” (right pedal goes right to tighten, left pedal goes left to loosen).
- Think of the left pedal as having the “opposite” thread compared to regular screws.
- Mark your tools or pedals with a small sticker as a reminder.
Step-by-Step Instructions: How to Loosen a Bike Pedal
Correct Positioning for Maximum Leverage
- Turn your bike so you easily reach both pedals.
- Stand on the same side of the pedal you want to loosen.
- For more power, place the wrench so you can push it downwards using your body weight.
- Keep your other hand steady on the bike frame for balance.
Detailed Loosening Technique for Each Side
- Right Pedal (Drive Side):
- Attach the wrench to the pedal axle (where the pedal meets the crank arm).
- Turn the wrench counter-clockwise (to the left) to loosen.
- If tight, gently apply more force. Push, do not hit.
- Left Pedal (Non-Drive Side):
- Attach the wrench to the pedal axle.
- Turn the wrench clockwise (to the right) to loosen.
- Use steady, firm pressure.
- Once loose, remove the pedal by spinning it off by hand.
- Wipe off any grease or dirt.
Troubleshooting: What to Do When Bike Pedal Is Stuck
Advanced Techniques for Seized Pedals
- Apply penetrating oil where the pedal meets the crank arm.
- Let the oil soak for 10-15 minutes.
- Try loosening the pedal again with the wrench.
When and How to Use Penetrating Oil or Heat
- If oil does not work, carefully use a hairdryer on the crank area to heat it up. The metal expands and can loosen the bond.
- Never use an open flame.
- Be patient and try oil and heat a few times if needed.
When to Seek Professional Help
- If the pedal does not move after several tries, or if the tool slips and starts rounding the pedal’s edges, stop.
- Visit a local bike shop for professional help.
- Do not force too hard or you may break parts of your bike.
Safety Tips and Common Mistakes to Avoid When Removing Bike Pedals
Injury Prevention and Protective Gear
- Always wear gloves to protect your knuckles and fingers.
- Wear safety glasses if working with oil, in case it splashes.
- Keep your workspace clean to avoid slips and falls.
Checklist: Double-Check Before and After Loosening
- Make sure the bike is steady before you start.
- Check which pedal you are working on (right or left).
- Double-check the direction you need to turn to loosen each pedal.
- Inspect the pedal and crank arm for any damage after removing the pedal.
Visual Guide: Infographics and Pro Tips for Loosening Pedals
Step-by-Step Images and Diagrams
- Look for diagrams showing the correct direction to turn each pedal.
- Use images that show tool placement on the pedal axle.
- Real-life photos or simple line drawings work best.
Video Walkthrough Recommendations
- Search for “how to loosen bike pedal” videos on YouTube.
- Choose videos with clear, slow demonstrations and English subtitles.
- Pause and replay steps as needed while you work.
FAQ: Answers to Common Questions About Loosening Bike Pedals
- Q: Do all pedals loosen in the same direction?
A: No, the right pedal loosens left (counter-clockwise), the left pedal loosens right (clockwise). - Q: What if I don’t have a pedal wrench?
A: Use a regular wrench that fits, but be careful not to damage your pedals. - Q: Why won’t my pedal come off?
A: It may be rusted or too tight. Use oil, heat, or consult a professional. - Q: Can I reuse my old pedals?
A: Yes, if they are not damaged. Clean before re-installing. - Q: How often should I remove and grease pedals?
A: Check once a year, especially if your bike gets wet or muddy. - Q: Is this process the same for all bikes?
A: Yes, for most standard bikes. Some special pedals may need a different tool.
Conclusion: Key Points and Next Steps
- Remember the thread directions: right pedal is regular, left pedal is reverse.
- Use the right tools and work safely.
- Troubleshoot using oil and heat if needed—do not force stuck pedals.
- Keep your pedals greased and remove them regularly for easy maintenance.
- Ask for help if unsure, and always double-check your work for safety.
Now you know how to loosen a bike pedal step by step. Practice these skills to keep your bike in great shape and ride safely!