
Essential Tools and Materials for Removing Bike Pedals
Classic vs. Smart Tools: What’s Best in 2026?
To remove a bike pedal, you need the right tools. In 2026, both classic and smart tools are useful. Classic tools include a pedal wrench and a regular 15mm wrench. Smart tools are digital torque wrenches and multi-function bike repair kits. Choose the one that matches your needs and bike model.
- 15mm pedal wrench or adjustable wrench
- Digital torque wrench (optional for advanced users)
- Grease or anti-seize compound
- Cleaning cloth
- Penetrating oil (for stuck pedals)
Safety Equipment and Workspace Preparation Checklist
- Wear protective gloves
- Use safety glasses
- Set up a stable bike stand or lay the bike on a flat surface
- Remove clutter from your work area
- Keep tools within reach
Understanding Pedal Threads and Bike Anatomy
Left vs. Right Pedal: Identifying and Avoiding Common Mistakes
Bike pedals are different on each side. The right pedal is on the side with the chain. The left pedal is on the opposite side. The thread direction of each pedal is also different. Mixing this up can damage your bike.
How Pedal Thread Direction Works (with Visual Guide)
The right pedal (drive side) loosens counterclockwise. The left pedal (non-drive side) loosens clockwise. This stops pedals from coming off while riding. Always check the “L” or “R” marks on pedal spindles.
- Right Pedal: Standard thread, turn left to loosen
- Left Pedal: Reverse thread, turn right to loosen
Step-by-Step Guide: How to Remove a Pedal from a Bike
Bike Positioning and Stability Tips
- Place the bike in a repair stand for stability. If you do not have a stand, lean the bike securely against a wall or lay it on its left side.
- Make sure the pedals are easy to reach and the bike will not tip over when you apply force.
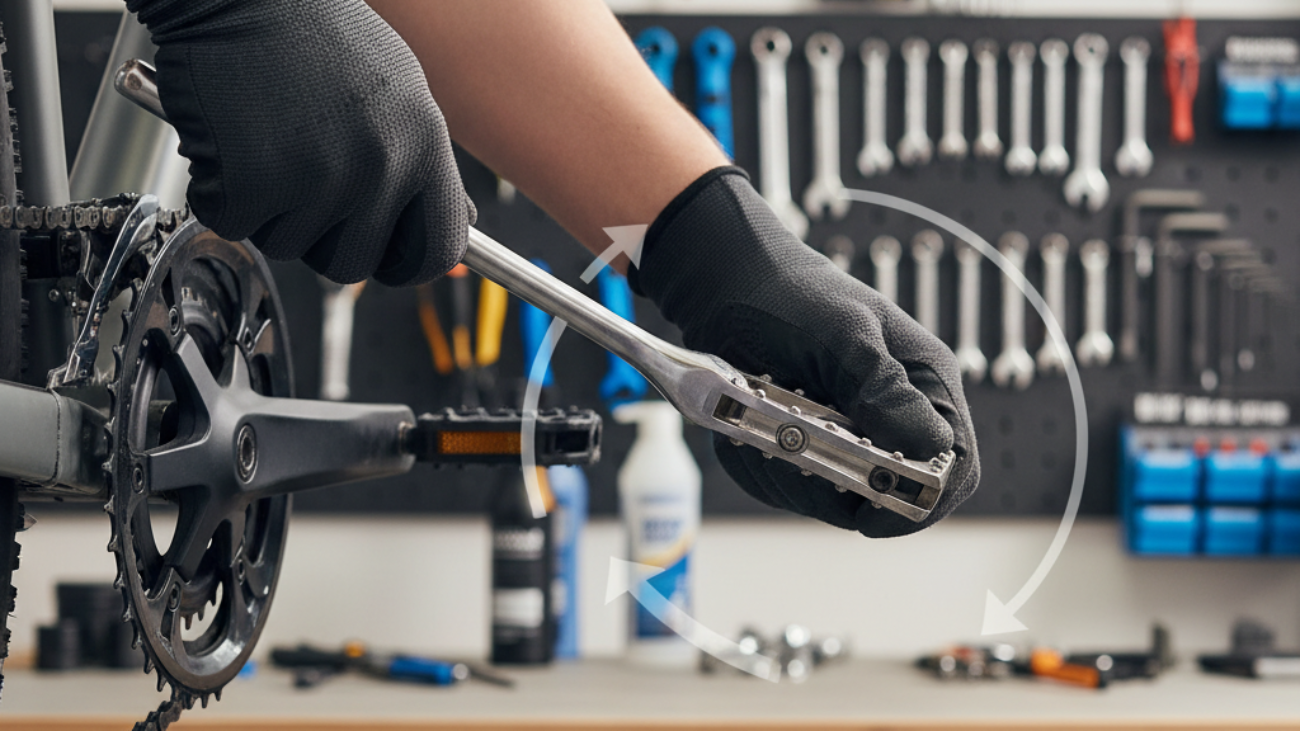
Correct Tool Placement and Angle
- Locate the flat surfaces on the pedal spindle, close to the crank arm.
- Fit the pedal wrench or adjustable wrench fully onto these flats.
- Position the wrench so that you can push downward with your weight. This helps avoid slipping and injury.
Applying the Right Force: Techniques for the Left and Right Pedals
- To remove the right pedal, turn the wrench counterclockwise.
- To remove the left pedal, turn the wrench clockwise.
- If the pedal is tight, spray a small amount of penetrating oil at the pedal thread and wait five minutes.
- Use smooth, controlled force to loosen the pedal. Do not jerk or twist suddenly.
Finishing Removal and Inspecting Thread Condition
- Once loose, unscrew the pedal by hand.
- Remove both pedals one at a time.
- Inspect the threads on both the pedal and crank arm for damage, dirt, or rust.
- Clean threads with a cloth before reinstalling or storing the pedals.
Video Walkthrough: Pedal Removal for Beginners and Experts
Live Demo with Modern Bikes (2026 Models)
Many new bikes come with QR codes on the frame. Scan the code to watch a step-by-step pedal removal video. This shows real time pedal removal on 2026 models, making each step easier to understand.
Common Problems Shown and Solved On-Camera
The guide demonstrates tight pedals, rusted threads, and correct tool angles. Watch the troubleshooting section for help with stuck pedals and preventing damage.
Troubleshooting: How to Remove Stuck or Rusted Bike Pedals
Safe Use of Penetrating Oils and Advanced Tools
- Apply a few drops of penetrating oil to the pedal thread junction.
- Wait at least five minutes to let the oil soak in.
- Use the wrench to try loosening the pedal again, using steady force.
- A long-handled wrench or breaker bar may help if the pedal is still stuck.
Preventing Thread and Crank Damage
- Keep the wrench securely on the flats to avoid slipping.
- Do not use hammers or extreme force, as this can strip threads or damage cranks.
Professional Tips for E-Bikes and Specialized Pedals
- Check your e-bike’s manual for any special pedal removal instructions.
- Some pedals need an Allen key instead of a regular wrench. This fits into the end of the pedal axle.
- For e-bikes, unplug the battery before starting work for safety.
Expert Tips for Easy Pedal Installation and Future Maintenance
Proper Pedal Greasing and Thread Preparation
- Before reinstalling pedals, clean threads with a cloth.
- Apply a thin layer of grease or anti-seize compound to the pedal threads. This prevents rust and makes future removal easier.
Torque Specifications and Smart Torque Tools (2026)
- Tighten pedals to the recommended torque, usually 35–40 Nm (newton-meters).
- Use a digital torque wrench for best accuracy, especially on carbon or lightweight cranks.
Avoiding Cross-Threading and Over-Tightening
- Start threading pedals by hand. If you feel resistance, stop and try again to avoid cross-threading.
- Do not use unnecessary force. A snug fit is tight enough once the pedal is fully threaded in.
FAQ: Removing Bike Pedals—Your Top Questions Answered
What to Do If Your Pedal Won’t Budge?
Use penetrating oil and let it sit. Try a longer wrench for more leverage. If the pedal is still stuck, visit a bike shop for help.
Can You Remove Pedals Without a Pedal Wrench?
Yes. A 15mm open-end wrench or an Allen key (for some models) can work. Be careful to avoid slipping and damaging parts.
Are the Steps Different for E-Bikes, Road Bikes, or Kids’ Bikes?
The basic removal steps are the same for all bikes. Some e-bikes or specialized bikes use different tools or have extra safety steps. Always check the manual.
How Often Should Pedals Be Removed or Replaced?
Check and remove pedals at least once a year for cleaning and greasing. Replace pedals if they creak, have damage, or spin unevenly.
Common Mistakes When Removing Pedals and How to Prevent Them
Thread Direction Confusion
- Remember: right pedal loosens to the left, left pedal loosens to the right. Mark your tools or pedals to help remember.
Stripping the Pedal or Crank Threads
- Use the correct tool, keep it straight, and apply steady pressure to avoid damage.
Using Wrong Tools and Their Risks
- Never use adjustable pliers or improper tools. They slip and damage the pedal flats. Only use wrench sizes that fit snugly.
Visual Guide: Diagrams and Torque Reference Charts (2026 Edition)
Printable Step-by-Step Infographic
Download and print a visual guide showing each pedal removal step, tool placement, and thread directions. These graphics can help new and young riders follow along.
Printable Torque Specs and Thread Direction Chart
| Pedal Side | Loosening Direction | Tightening Torque |
|---|---|---|
| Right (Drive Side) | Counterclockwise | 35–40 Nm |
| Left (Non-Drive Side) | Clockwise | 35–40 Nm |
Conclusion: Confidently Remove Any Bike Pedal—Every Time
Removing a bike pedal is a basic skill every rider can learn. Using the correct tools and steps helps prevent damage and ensures your bike stays safe. Always double-check pedal direction, use the right amount of force, and follow safety tips. Review this guide when needed and don’t hesitate to ask an expert if you have trouble. Regular pedal maintenance keeps your bike in great condition for safe rides every time.