
Quick Comparison Table – Best Methods to Remove Bike Pedals in 2026
Tool Requirements & Costs
| Method | Tools Needed | Estimated Cost (2023–2026) |
|---|---|---|
| Classic Wrench | 15mm pedal wrench | $15–$30 (basic models), $40+ (pro-grade) |
| Allen Key | 8mm or 6mm Allen key | $5–$25 |
| Household Items | Adjustable/Crescent wrench | $0–$15 (if already owned) |
| New 2026 Tools | Pro pedal remover (e.g., Park Tool PW-4) | $35–$65 |
| Stuck Pedal Removal | Penetrating oil + above tools | $5–$10 for oil |
| Eco-Friendly Solutions | Plant-based grease/lube | $5–$20 |
| Pro Mechanic’s Approach | Pro tool kits, stands | $70–$200+ |
Time & Skill Level Needed
| Method | Avg. Time Per Pedal | Skill Level Required |
|---|---|---|
| Classic Wrench | 2–5 min | Beginner–Intermediate |
| Allen Key | 1–4 min | Beginner |
| Household Items | 3–6 min | Beginner |
| New 2026 Tools | 1–3 min | Intermediate |
| Stuck Pedal Removal | 5–10 min | Intermediate+ |
| Eco-Friendly Solutions | 5–10 min | Beginner |
| Pro Mechanic’s Approach | 1–3 min | Advanced |
Pros and Cons of Each Method
| Method | Pros | Cons |
|---|---|---|
| Classic Wrench | Available; fits most pedals; prevents rounding when proper size | Low leverage if short; some risk of stripping if poor fit |
| Allen Key | Portable; fits modern pedals; quick | Poor leverage on seized pedals |
| Household Items | Convenient; often no purchase needed | Risk of slippage/rounding; thick jaws may not fit |
| New 2026 Tools | High leverage; ergonomic; reduces risk of damage | Costly; might be overkill for basic jobs |
| Stuck Pedal Removal | Solves seized pedals; reusable tools and oil | Additional wait time; messier process |
| Eco-Friendly | Sustainable; low environmental impact | Typically more expensive; reapplication may be needed |
| Pro Mechanic | Fastest, safest; guarantees minimal damage | Requires investment; pro skill |
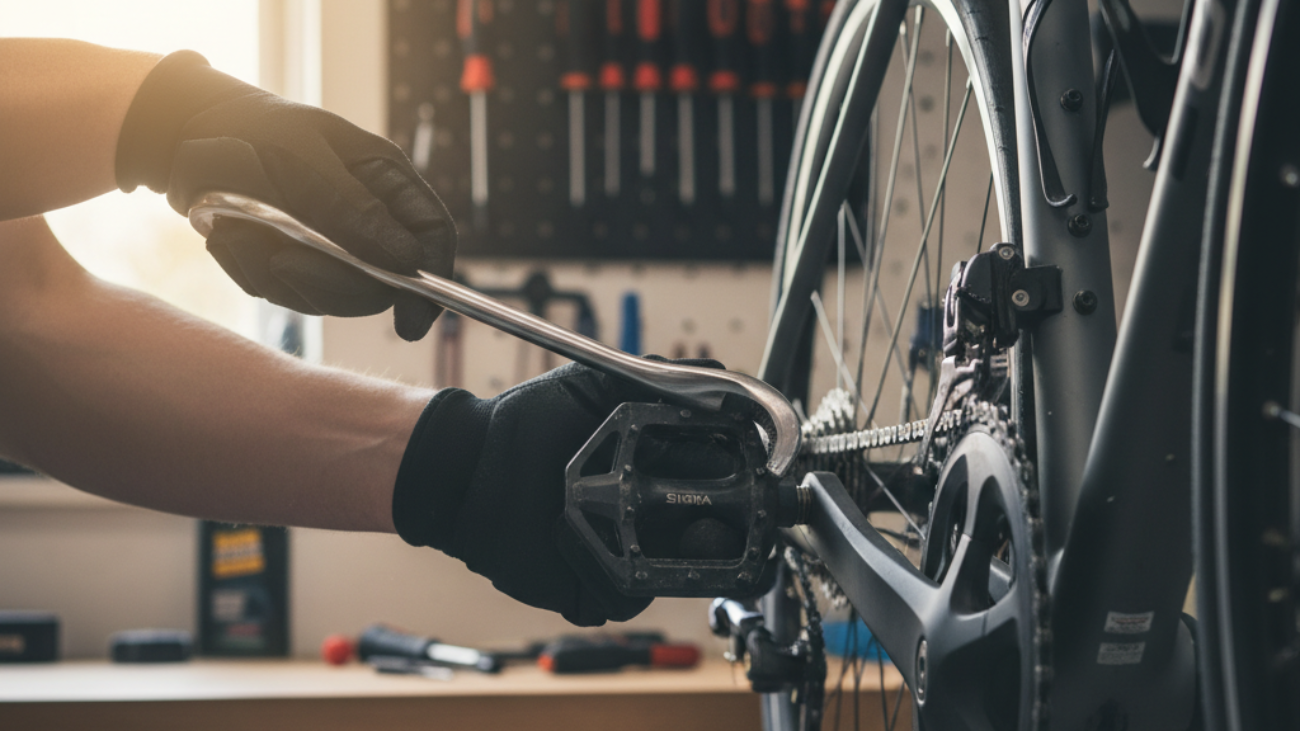
Method 1 – Classic Wrench Technique for Removing Bike Pedals
Tools Needed
- 15mm pedal wrench (thin profile recommended)
Step-by-Step Instructions
- Place bike on a stable surface or repair stand.
- Locate “L” (left, reverse thread) and “R” (right, standard thread) on pedal spindles.
- Rotate the crank forward (3 o’clock for right, 9 o’clock for left) for leverage.
- Attach wrench securely to pedal flats, pointing tool rearward (toward bike’s back wheel).
- Press down firmly—right pedal loosens counterclockwise, left pedal clockwise.
- Once loose, unscrew pedal by hand and repeat on opposite side.
When to Use This Method
- Standard or older pedals with exposed 15mm flats
- Situations demanding basic, low-cost tools
Method 2 – Allen Key Removal for Modern Bike Pedals
Identifying Compatible Pedals
- Check pedal spindle at crankarm’s back for 8mm or 6mm Allen key slot.
Simple Steps with Allen Key
- Place Allen key into back of spindle, ensure snug fit.
- Turn toward bike’s rear: right pedal loosens counterclockwise, left pedal clockwise.
- If needed, extend key with pipe for more leverage.
- Remove pedal by turning and pulling away from crank arm.
Tips for Safe and Easy Removal
- Use longer-handled Allen keys for more leverage.
- Apply downward force steadily to avoid rounding.
Method 3 – Using Household Items to Remove Bike Pedals
Common Household Tools That Work
- Adjustable crescent wrench (thin jaws preferred)
- Channel locks (last resort, risk higher of damage)
Step-by-Step Guide
- Fit wrench tightly on pedal flat.
- Hold the opposite crank for support.
- Rotate tool towards rear wheel to loosen pedal.
- Avoid excessive force to prevent rounding flats.
Best Situations for This Hack
- Emergency repairs away from home
- When no bike-specific tools available
Method 4 – New Bike Pedal Removal Tools & Innovations in 2026
Latest Tools and Gadgets
- Pro pedal wrenches (e.g., Park Tool PW-4) with ergonomic handles
- Threadless pedal/crank removers (e.g., SpinTech® tools for specific stationary/crank types)
How They Differ from Traditional Tools
- Longer, insulated handles for increased leverage and comfort
- Precision-fit jaws to minimize risk of rounding
- Innovations mainly mechanical—no widespread smart or powered removers reported by 2026
Real-World Use Cases
- High-volume bike shops
- Frequent component swaps (commuting/MTB/rental fleets)
- Effective on carbon and alloy crank sets, reducing failure risk
Method 5 – Removing Stuck or Seized Bike Pedals
Prepping the Pedal and Crank Arm
- Spray threads and crank join with penetrating oil or plant-based lubricant
- Let sit for at least 10–15 minutes
Penetrating Oil and Leverage Techniques
- Use pedal wrench or Allen key as above.
- Apply body weight or use extender pipe for leverage.
- If still stuck, tap the tool gently with mallet (avoid carbon cranks).
- As last resort, remove crank arm and try again, or apply gentle heat to spindle (avoid bearings).
Avoiding Damage to the Bike
- Do not use excessive heat or hammering.
- Avoid oversized wrenches; use correct fit only.
- Seek professional help if threads show any sign of stripping.
Method 6 – Eco-Friendly & Low-Impact Pedal Removal Solutions
Sustainable Tools and Lubricants
- MountainFLOW Bike Grease (plant-based, biodegradable)
- Gear Hugger Eco Dry Bike Lubricant (97% bio-based)
- BBB BioLube Wet Lube
- CyclOn Bike Care Plant-Based Lubricants
- Muc-Off Bio Dry Lube (biodegradable, solvent-free)
Environmental Benefits
- Reduce petroleum use and microplastics in soil/water
- Biodegradable ingredients benefit long-term ecosystem health
- Low-toxicity formulas safe for home use and disposal
User Experiences
- Pedals come off as easily as with mineral/oil lubes
- Some products require more frequent reapplication under heavy use
Method 7 – Pro Mechanic’s Approach (2026 Standards)
Step-by-Step Professional Workflow
- Secure bike in professional workstand for stability
- Use high-end pedal wrench or pro-grade Allen/P-handle hex key
- Apply torque steadily (never jerk) in the correct direction
- Use thread gauge to check for any damage after removal
- Clean and grease threads before reinstalling pedals
Advanced Tools and Safety Precautions
- Torque wrenches for accurate installation/removal (target: 31–40 Nm)
- Anti-slip gloves and crank braces to prevent injury
- Thread chasers for restoring damaged internal threads
When To Use Professional Help
- Pedals are completely seized or threads are stripped
- High-end carbon cranks, or rare pedal/crank combinations
Mistakes to Avoid When Removing Bike Pedals
Left vs. Right Pedal Threading Explained
- Right pedal: standard thread, loosens counterclockwise
- Left pedal: reverse thread, loosens clockwise
Common Damage Risks and How to Prevent Them
- Cross-threading: Always hand-start pedal before tightening
- Over-tightening: Torque to no more than 40 Nm
- Rounding flats or stripping hex: Use proper tool, good fit
Misconceptions in 2026
- No “smart” tools commonly available—skilled manual technique remains key
- Over-tightening does not prevent loosening but causes most stuck pedal problems
Troubleshooting: Best Solutions for Common Bike Pedal Removal Problems
Stripped Threads
- Stop removing immediately—attempt a thread chase tool or seek shop repair
- If threads are badly damaged, crank replacement may be necessary
Rounded Off Pedal Spindles
- Switch to correct tool (long-handled pedal wrench or Allen key)
- If still stuck, vise grips as last resort—expect to replace pedal
Rust and Corrosion
- Use generous penetrating oil, wait longer, and alternate tightening/loosening motions gently
- Once removed, clean, chase threads, and apply anti-seize before reinstalling
FAQ: How Do I Remove Bike Pedals? Popular Questions in 2026
Do I Need Special Tools for New Pedals?
Most modern pedals require a quality 15mm pedal wrench or Allen key (6mm or 8mm). Occasionally, newer e-bikes may need proprietary removal tools—check manufacturer specs.
What If My Bike Pedals Won’t Budge?
Apply penetrating oil, wait, use maximum leverage. If the problem persists, consult a pro mechanic to avoid crank damage.
Should I Grease Pedal Threads When Reinstalling?
Yes—always apply bike-specific grease or plant-based lube to prevent seizing and ease future removal. Target torque is 31–40 Nm.
Resources: Where to Buy the Best Bike Pedal Removal Tools in 2026
Trusted Online Retailers
- Best Buy Canada – Bike Tool Kits
- FortNine – Pedal Removal Tools
- Check Amazon, eBay, and specialized cycling e-shops for latest availability
Local Bike Shops
- Most dedicated bike shops carry Park Tool, Pedro’s, BBB, and proprietary removal tools
- Inquire for eco-friendly lubricant and grease options on-site
Emerging Smart Tools and AI-Assisted Solutions
- As of early 2026, no widely available AI-powered pedal removal gadgets found. Mechanical refinement and eco-lube innovation lead advancements.
Ready to swap your pedals? Choose the right tool for your skill and budget, follow these research-backed steps, and enjoy hassle-free riding. For expert-level kits or eco-friendly lubes, check links above or visit your trusted shop.