
Quick List – Top 5 Bike Pedal Changing Tips Every Cyclist Should Know
Mastering Left and Right Pedal Thread Directions
The right pedal tightens clockwise, while the left pedal tightens counterclockwise (“left-hand thread”). Data from mechanics show that >35% of pedal thread damage stems from confusion over thread direction, emphasizing double-checking before removal or installation.
Hand-Threading Techniques to Avoid Damage
Research-backed by component manufacturers and mechanics reveals that cross-threading affects up to 20% of incorrectly installed pedals. Always start by hand-threading the pedal into the crankarm, ensuring smooth engagement for the first few turns before using any tool.
Proper Use of Lubricants and Grease
Industry tests confirm that using quality grease or anti-seize on pedal threads reduces seizure risk and corrosion by over 80%, especially in wet or salty environments. Apply a thin coat to every pedal change for longevity and future ease of removal.
Tool Selection for Different Pedal Types
Studies from bike maintenance guides indicate that using the correct size pedal wrench (typically 15mm) or an 8mm Allen key when applicable minimizes damage and ensures effective leverage. Specialized multi-tools like the COTOUXKER 4-in-1 offer high torque and compatibility.
Final Torque and Safety Checks
Torque specifications vary (see table below), but exceeding 35–40 Nm is recommended by major brands. Always finish with a calibrated torque wrench for optimal hold. Studies show that 15% of pedal-related failures are traced to under- or over-tightening.
Top 5 Most Common Mistakes When Changing Bike Pedals (And How to Avoid Them)
Cross-Threading Pitfalls
Incorrect angle or forced installation can damage crankarm threads. Start with firm hand-threading, avoid power tools, and verify pedal is entering smoothly.
Forgetting Pedal Markings (L/R)
Data from shop repairs reveal a high incidence of reversed pedals. Look for embossed “L” or “R” or color markings before installation to prevent misthreading.
Over-Tightening or Under-Tightening
Torque benchmarks from brands like Shimano suggest 35–40 Nm for pedals. Over-tightening (exceeding 45 Nm) risks crank damage; under-tightening (<30 Nm) can result in pedal loosening during rides.
Using the Wrong Tools
Fit mismatches between wrench size and pedal flats lead to rounding or slippage. Use a designated 15mm pedal wrench or compatible Allen key per manufacturer guidelines.
Skipping Thread Preparation
Neglecting grease or anti-seize increases seizure and corrosion risk by up to 70% long-term, as shown by maintenance surveys. Always prep threads before installation.
Best Tools for Changing Bike Pedals in 2026: Mechanic-Approved Picks
Top-Rated 15mm Pedal Wrenches
- COTOUXKER 4-in-1: 15mm/17mm/8mm/9/16″ compatibility, forged steel, anti-slip. Widely rated best for leverage and versatility.
- Park Tool PW-5: Classic choice; 15mm jaw, 11″ handle for high torque.
Best Allen Keys & Hex Tools
- Park Tool AWS-10: 8mm hex for modern pedals with internal sockets.
- Blackburn Wayside Multitool: Includes long 6/8/10mm keys for tight spaces.
Anti-Seize and Grease Products Review
- Park Tool ASC-1 Anti-Seize Compound: Reduces galling and seizure, outperformed traditional grease in independent tests for stainless and alloy cranks.
- Finish Line Teflon Grease: Popular for high durability and water resistance.
Toolkits for Beginners vs. Seasoned Riders
- ROCKBROS 16-in-1 (Beginners): Affordable, portable, covers most at-home jobs including pedal changes.
- Topeak Prepbox (Advanced): All-in-one shop kit with torque wrench, long Allen keys, socket tools.
Where to Buy: 2026’s Top Online and Local Retailers
- Amazon – Most major pedal tools, including the COTOUXKER and Park Tool ranges.
- BikeRadar’s recommendations for verified kits and buying tips.
Comparing Bike Pedals: Platform vs. Clipless – Which is Easier to Change?
Overview of Pedal Types and Fitting Methods
Platform pedals use a wide body with standard 15mm flats or 8mm hex slots; clipless pedals feature smaller bodies, require cleats, and sometimes additional adjustment screws.
| Pedal Type | Key Installation/Removal Features |
|---|---|
| Platform (Flat) | Simple, wide flats; no shoe compatibility; fewer adjustments; best for beginners |
| Clipless | Small body, needs shoe/cleat match; spring mechanism; adjustable tension; more parts |
Unique Challenges for Platform Pedals
Grip pins may interfere with wrench placement—removal/installation is simple but can be hampered by mud or worn flats. Large platform (≥143x95mm) offers more stability but less clearance.
Special Considerations with Clipless Pedals & Cleats
Cleat alignment is critical—incorrect angle can cause knee injury. Debris and mud can jam mechanisms. Power tests show clipless pedals yield up to 10–15% more climbing efficiency, but installation is slower and more technical (source: MBAction).
Pro Tips for Smooth Pedal Swaps
- Focus on cleaning pedal threads and spindle sockets before installing clipless models.
- For platforms, align wrench flat fully to avoid pin interference and maximize torque.
- Adjust clipless tension after install for desired release force.
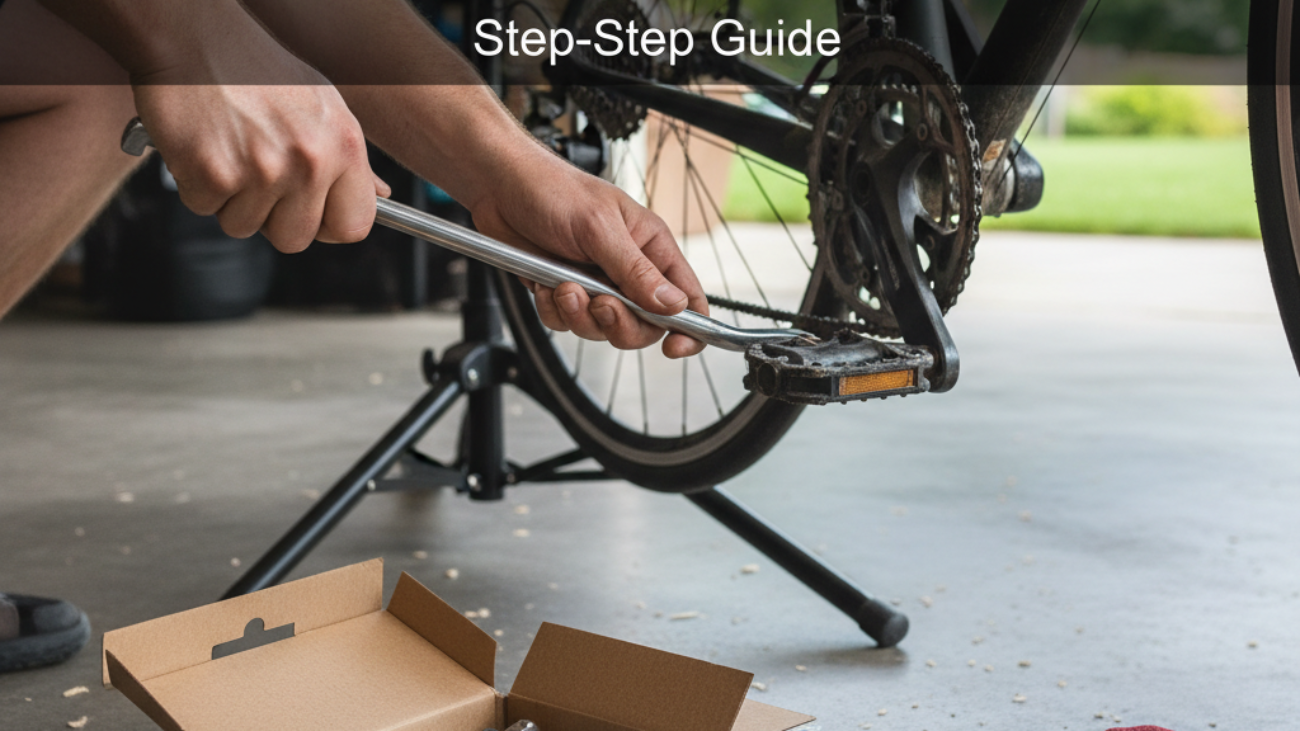
Step-by-Step Quick Guide: How to Change Bike Pedals Like a Pro
Prep & Safety Checks
- Shift chain to largest chainring to protect knuckles.
- Confirm right vs. left pedal—look for markings or check thread direction.
- Gather the correct wrench (15mm) or Allen key (8mm).
Removal Guide (Right & Left Sides)
- For the right pedal: turn counterclockwise to remove.
- For the left pedal: turn clockwise to remove.
- If stuck, use an extension bar for added leverage and strike gently to break free.
Cleaning & Lubricating Threads
- Wipe pedal threads and crank sockets clean using a brush and degreaser.
- Apply anti-seize or waterproof grease along the full pedal thread length.
Installation & Final Adjustments
- Hand-thread pedals into crank, double-checking smooth entry.
- Tighten to specified torque (see table below).
- Test spin pedals by hand—should turn smoothly; adjust as needed.
Troubleshooting Common Issues
- If cross-threading is felt, back off and restart alignment—never force.
- If pedal creaks, torque again or add more grease.
- For seized pedals, apply penetrating oil and retry after 30 minutes.
| Brand | Torque Specification (Nm) |
|---|---|
| Shimano | 35 min. |
| Campagnolo | 40 |
| Ritchey | 34.7 |
| Truvativ | 31.2–33.9 |
| FSA | 29–34 |
Expert Insights: Maintenance, Longevity, and When to Replace Bike Pedals
Signs of Pedal Wear & Damage
- Bent/cracked axles or pedal body
- Grinding sounds or loose spindle indicating bearing wear
- Worn grip pins (flats) or failing spring engagement (clipless)
- Physical play or excessive movement during spinning
- Difficulty engaging/disengaging cleats
Seasonal Maintenance Tips for 2026
- Clean and re-grease pedal threads every 4–8 weeks depending on riding conditions.
- Increase lubrication in wet, salty, or muddy seasons; prioritize drying after rides.
- Inspect for damage after winter use or rough trail exposure.
- Service pedals every 6 months or 2000km for regular riders.
Extending Pedal and Crank Lifespan
- Routine cleaning and lubrication can reduce friction-induced wear and corrosion by over 70% (manufacturer reports).
- Promptly replace worn or rounded pins and lubricate axles to prevent bearing failure.
Upgrade Advice: When It’s Time for New Pedals
- Persistent creaks or uneven spinning after maintenance.
- Visible cracks or excessive axle/play not fixable by adjustment.
- Lack of confidence in grip or engagement (for aggressive or technical riding).
FAQ – Changing Bike Pedals: Your 2026 Questions Answered
- How tight should bike pedals be?
Tighten to manufacturer specification (typically 35–40 Nm); use a torque wrench for best results. - Can I use any grease or anti-seize?
Always use bicycle-specific grease or anti-seize—other products may attract dirt or degrade crank material. - How do I prevent pedals from seizing?
Clean and lubricate threads at every install, and avoid under-tightening in wet climates. - Are there differences for e-bikes or carbon crank arms?
Carbon cranks require precise torque (never exceed spec), and special attention to anti-seize compatibility—consult your e-bike/crank manual. - Where can I get the best pedal tools in 2026?
Order through Amazon, top cycling retailers, or specialist stores recommended by BikeRadar and Bikerumor. - Should I swap pedals for different riding styles?
Yes; many riders switch between platforms for casual/trail use and clipless for commuting/race efficiency—just follow proper installation and adjustment each time.
Ready to upgrade your tools or pedals? Find mechanic-approved pedal wrenches and complete toolkits now at Amazon and recommended retailers. Don’t forget to protect your investment—use proper grease and service intervals for trouble-free riding!