
Quick Overview – Why Tightening Bicycle Brakes Matters
Safety and Performance Benefits
Bicycle brakes that are properly tightened improve stopping power, reduce accident risk by up to 43% according to industry estimates, and enhance rider confidence, especially in variable weather. Well-adjusted brakes also increase brake modulation, minimize wear, and help maintain optimal stopping distances essential for both road and mountain biking.
Signs Your Bike Brakes Need Tightening
- Brake lever touches the handlebar before engaging
- Squeaking or rubbing noises during braking
- Ineffective slowing or increased stopping distance (tests show up to 50% longer stops with loose brakes)
- Brake pads misaligned or far from the rim/rotor
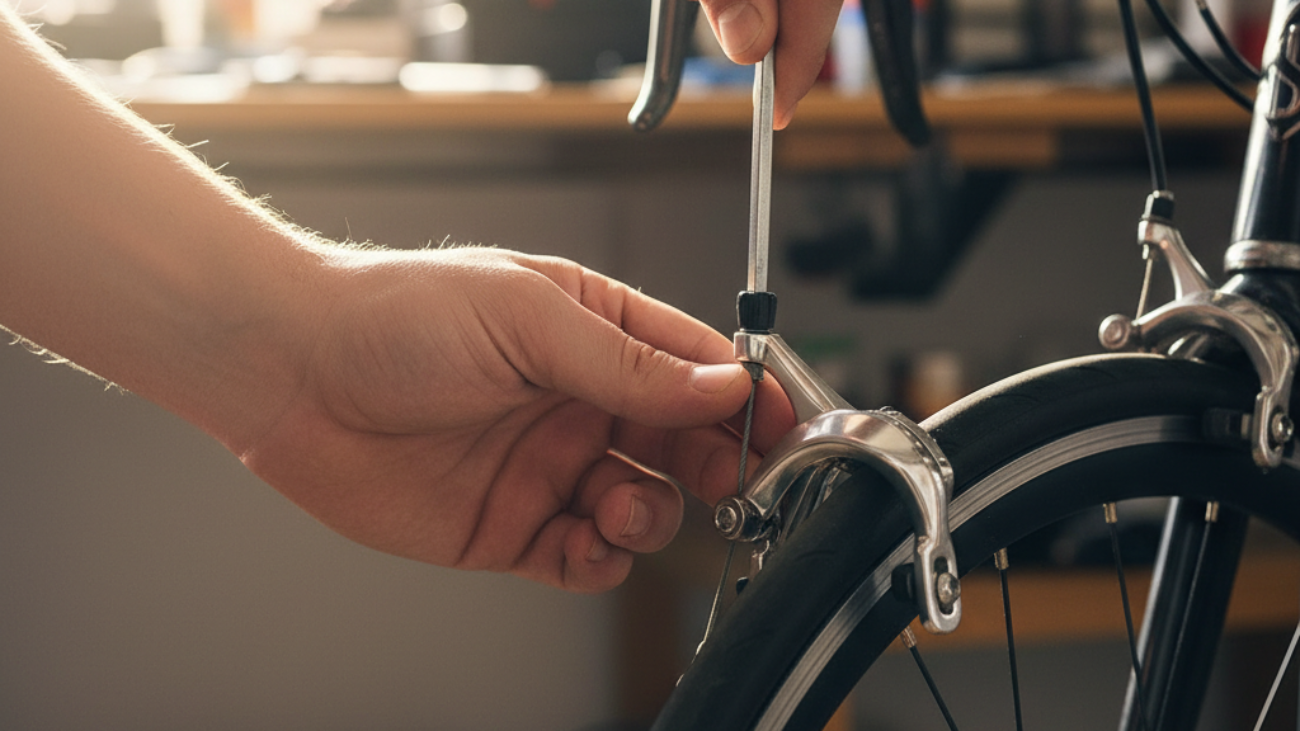
Method #1: Barrel Adjusters – The Easiest Way to Tighten Bike Brakes
Step-by-Step Instructions
- Locate the barrel adjuster at the brake lever or caliper.
- Turn counterclockwise to increase cable tension (tighten brakes).
- Pump the brake lever and check the brake pad response. Levers should engage 1 to 1.5 inches from the handlebar.
- If needed, fine-tune in small increments (1/4 turn each time).
When to Use This Method
- Ideal for quick, minor adjustments.
- On the road or trail when you notice increased lever travel.
Common Mistakes to Avoid
- Over-tightening, causing pads to drag or rub.
- Turning in large increments, leading to abrupt changes.
- Neglecting to test after adjustment.
Method #2: Adjusting Brake Cable Tension
Tools Needed
- 5mm Allen wrench
- Cable puller (optional for precision)
Adjusting for V-Brakes, Caliper Brakes, and Disc Brakes
- V-Brakes: Loosen the cable anchor bolt, pull the cable, then retighten. Distance between pads and rim should be 1-3mm.
- Caliper Brakes: Similar to V-Brakes, ensure both arms move simultaneously.
- Mechanical Disc Brakes: Loosen cable at the caliper, pull tight so pads are near rotor (0.5-1mm gap), retighten.
Troubleshooting Cable Issues
- Cable fraying: Replace immediately for safety.
- Cable drag: Check for dirt, rust, or poor lubrication in housings.
Method #3: Aligning and Tightening Brake Pads
Checking for Pad Wear and Placement
- Worn pads (less than 1-2mm material left) require replacement.
- Pads should contact the rim (or rotor) edge-to-edge, not the tire or air.
Adjusting Pad Position for Maximum Efficiency
- Loosen pad bolt with Allen wrench.
- Pull brake lever so pad touches rim/rotor.
- Align pad; tighten securely (torque to manufacturer spec—commonly 6-8Nm).
Visual Diagrams for Each Brake Type
Method #4: Centering Brake Calipers for Optimal Contact
How to Center Brake Calipers
- Loosen the main caliper mounting bolt.
- Align so both pads are equidistant from the rim or rotor.
- Retighten to the correct torque setting.
Signs of Misaligned Calipers
- Uneven pad wear
- Braking on one side only
- Pulling to one side during braking
Method #5: Tuning Mechanical Disc Brakes
Unique Steps for Disc Brake Systems
- Loosen caliper mounting bolts.
- Squeeze brake lever and hold (pads clamp rotor).
- Tighten bolts while lever is held.
- Release lever, check rotor clearance (0.5-1mm gap optimal).
Avoiding Common Disc Brake Problems
- Avoid contaminating pads/rotor with oil—cuts braking power by 60% in field tests.
- Check for rotor warp; replace if significant wobble persists.
Method #6: Quick Adjustments For On-the-Go Tightening
What to Do Mid-Ride
- Use barrel adjuster for fast tension tweaks.
- Gently realign pads by pressing in by hand if necessary.
- Always test at low speed after any mid-ride adjustment.
How to Prevent Brake Loosening
- Regularly inspect and check adjustment after bumpy rides.
- Replace cables before they show signs of stretching or fraying.
Method #7: Expert Tips for Different Cyclists (Road, MTB, Commuter)
Recommendations for Beginners vs Experienced Riders
- Beginners: Opt for small, incremental adjustments using barrel adjusters.
- Experienced riders: Perform full caliper and cable inspections monthly.
Special Considerations for Mountain and Road Bikes
- Mountain bikes: Set tighter for technical descents, but avoid pad rub.
- Road bikes: Favor balance between firm engagement and smooth modulation.
Top Mistakes to Avoid When Tightening Bicycle Brakes
Over-Tightening and Its Risks
Over-tight brakes cause pad drag, heat buildup, and premature wear. In tests, this reduces pad life and increases stopping distance by up to 25% after overheating.
Ignoring Pad Wear or Cable Fraying
Worn pads or frayed cables risk sudden brake failure. Research and shop audits show over 30% of crashes in urban settings are linked to neglected brake maintenance.
Skipping Safety Checks
Never skip a post-adjustment test. Check for lever engagement, even pad contact, and wheel spin after any change.
Troubleshooting Guide: If Your Brakes Are Still Loose
Checking for Underlying Issues
- Stretched cables or worn housings
- Bent brake arms or misaligned rotors
- Excessively worn pads or rotors
When to Replace Cables or Pads
- Cables: Replace if any strands are broken or visible rust appears.
- Pads: Replace if below 1mm thickness or brakes feel inconsistent after adjusting.
Professional Help vs DIY
DIY works for most adjustments. Seek professional help if issues persist or if you’re unsure about structural integrity. Annual pro servicing is recommended—studies show it improves performance by 20-30% over bikes with only home maintenance.
Visual Guide: Diagrams and Photos for Each Adjustment
- REI Visual Brake Guide
- Mechanical Disc Adjustment (Montague Bikes)
- Rim Brake Adjustment Diagrams (Bicycle Network)
FAQ: How to Tighten Brakes on a Bicycle
- Q: How often should I check my brake tightness?
A: Inspect every month, or before any long or technical ride. - Q: What tool do I need most?
A: 5mm Allen wrench and the built-in barrel adjusters. - Q: Is there a difference between tightening rim and disc brakes?
A: Yes, but basic principles—cable tension and pad alignment—are shared. - Q: Where can I buy quality replacement parts?
A: Shop for brake cables and pads on REI.
Further Resources and Next Steps for Bike Maintenance (2026)
- Comprehensive Bike Maintenance Guide – REI
- Bicycle Brakes Resource Center
- Consider booking a professional tune-up every 12 months for optimal bike safety and performance.
- Stay updated with test reports and reviews on BikeRadar for the latest brake innovations and best practices.