
Understanding Bike Brakes: Types and Basic Principles
Rim Brakes vs. Disc Brakes Explained
Bike brakes help you slow down and stop safely. There are two main types: rim brakes and disc brakes. Rim brakes squeeze the wheel’s rim to create friction and stop the bike. Disc brakes use a metal disc—called a rotor—attached to the wheel, and special pads clamp onto the disc. Both types have different adjustment steps, which you will learn in this guide.
Essential Brake Components and Their Functions
Key parts of most bike brakes include brake levers (on the handlebars), cables or hoses (link the levers to the brakes), brake pads (grab the rim or rotor), and for disc brakes, a metal rotor. These components work together to control your speed and make sure you can stop safely.
Tools and Preparation: What You Need to Adjust Bike Brakes
Recommended Tools for Brake Adjustment
- Allen (hex) keys (usually 4mm, 5mm, or 6mm)
- A Phillips or flathead screwdriver
- Cable puller or pliers
- Bike stand (optional, for easier work)
- Clean rag
- Lubricant (for cables, if needed)
Safety Checks Before Starting
- Check your bike is stable, or use a bike stand.
- Spin each wheel to make sure it moves freely.
- Inspect brake pads—they should not be too worn or cracked.
- Examine the cables for frays or damage.
- Always work in a well-lit area.
How to Adjust Rim Brakes on a Bike
1. Aligning Brake Pads Correctly
- Loosen the bolt holding the brake pad with an Allen key.
- Position the pad so it sits flat against the rim, not touching the tire or hanging below the rim.
- Make sure the pad aligns with the braking surface’s center.
- Hold the pad in place and tighten the bolt.
2. Setting Cable Tension
- Squeeze the brake lever—if it touches the handlebar, the cable is too loose.
- Locate the barrel adjuster (a small dial where the cable enters the lever or brake arm).
- Turn the barrel adjuster out to tighten the cable, or in to loosen it.
- If needed, loosen the cable anchor bolt, pull the cable tighter with pliers, then retighten the bolt.
3. Centering the Brakes
- Check that both brake pads move and hit the rim at the same time when you squeeze the lever.
- If one pad hits before the other, use a screwdriver to turn the centering screw on the brake arm (usually a small screw near the pivot point).
- Turn the screw a small amount, then test. Repeat until both pads move evenly.
4. Troubleshooting Common Rim Brake Issues
- If the brakes feel spongy, check the cable for stretch or fraying.
- If pads squeal, clean the rim and pads with a rag and a little rubbing alcohol.
- If braking power is weak, check if pads are worn and replace if needed.
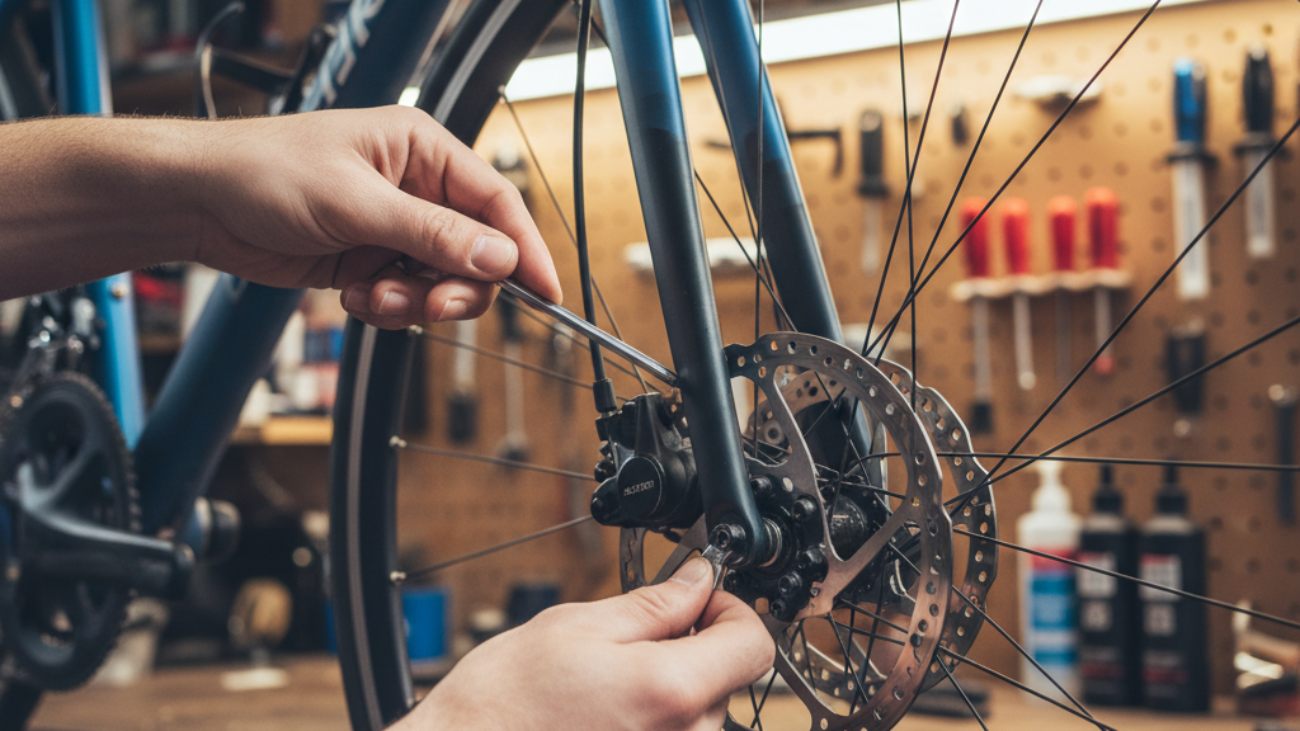
How to Adjust Disc Brakes on a Bike
1. Mechanical Disc Brake Adjustment Steps
- Use an Allen key to loosen the caliper bolts holding the brakes to the frame.
- Squeeze the brake lever, centering the caliper over the rotor.
- Tighten the caliper bolts while holding the lever.
- Release the lever and check if the pads rub on the rotor; adjust if needed by loosening bolts and realigning.
- If the brake feels weak, use a barrel adjuster to increase cable tension.
2. Hydraulic Disc Brake Adjustment Steps
- Hydraulic brakes usually self-adjust, but the caliper can still need alignment.
- Loosen the caliper mounting bolts with an Allen key.
- Squeeze the brake lever, letting the caliper center itself over the rotor, then tighten the bolts.
- If you hear rubbing, slightly loosen and realign until the rotor spins freely.
3. Resolving Disc Brake Squeal or Drag
- Clean the rotor and pads with rubbing alcohol—never touch them with your fingers.
- Check if the rotor is bent; if so, gently true it using a rotor truing tool.
- If pads are worn or contaminated, replace them.
Fine-Tuning and Testing Your Bike Brakes
1. Brake Lever Reach and Feel Adjustment
- With the bike at rest, squeeze each brake lever and feel for smooth, strong stopping.
- Most levers have a small screw or dial near the pivot—turn this to bring the lever closer to or farther from the handlebar for comfort.
- Make sure you can easily reach the levers with one or two fingers.
2. On-the-Road Testing and Tweaks
- Test ride your bike in a safe place.
- Gently apply each brake and notice how the bike responds.
- If the brakes feel weak or make noise, recheck alignment and cable tension.
- Repeat the adjustments as needed until you are satisfied with stopping power and lever feel.
Maintenance Tips: Keeping Your Bike Brakes in Top Condition
Routine Checks and Cleaning
- Check pad wear at least every month; replace if pads are less than 3mm thick.
- Wipe rims or rotors with a clean rag to remove dirt.
- Lubricate brake cables each season to prevent rust.
When to Replace Brake Pads or Cables
- Replace rim or disc brake pads when traction or grip decreases or grooves are worn out.
- If cables feel stiff or are frayed, replace them right away.
- Change hydraulic brake fluid yearly for best results.
Frequently Asked Questions About Adjusting Bike Brakes
How Often Should I Adjust My Bike Brakes?
Check your brakes every month, or anytime they feel weak or noisy. Adjust them after heavy use or if you notice changes in braking power.
Can I Adjust Brakes Without Special Tools?
You can make some minor adjustments, like turning barrel adjusters, by hand. However, most adjustments are easier and safer with the right tools, like Allen keys and pliers.
What If My Brakes Still Don’t Work After Adjustment?
If your brakes are still not working after adjustment, check for worn pads, damaged cables, or bent parts. Sometimes, professional help from a bike shop is necessary for complex issues.
Resources and Further Reading on Bike Brake Adjustment
- Park Tool: How to Adjust Bicycle Brakes
- Sheldon Brown’s Brake Adjustment Guides
- Manufacturer websites (Shimano, SRAM, Tektro, etc.) for specific brake models
- Local bike shops for expert advice and tuning
By following this step-by-step guide, you can keep your bike brakes adjusted, safe, and reliable. Learning how to adjust bike brakes is a useful skill for every cyclist. Regular checks and good maintenance help you ride confidently and stay in control.