
Quick Picks – Best Ways to Remove a Bike Pedal for Every Situation
Best Standard Method (with Pedal Wrench or Allen Key)
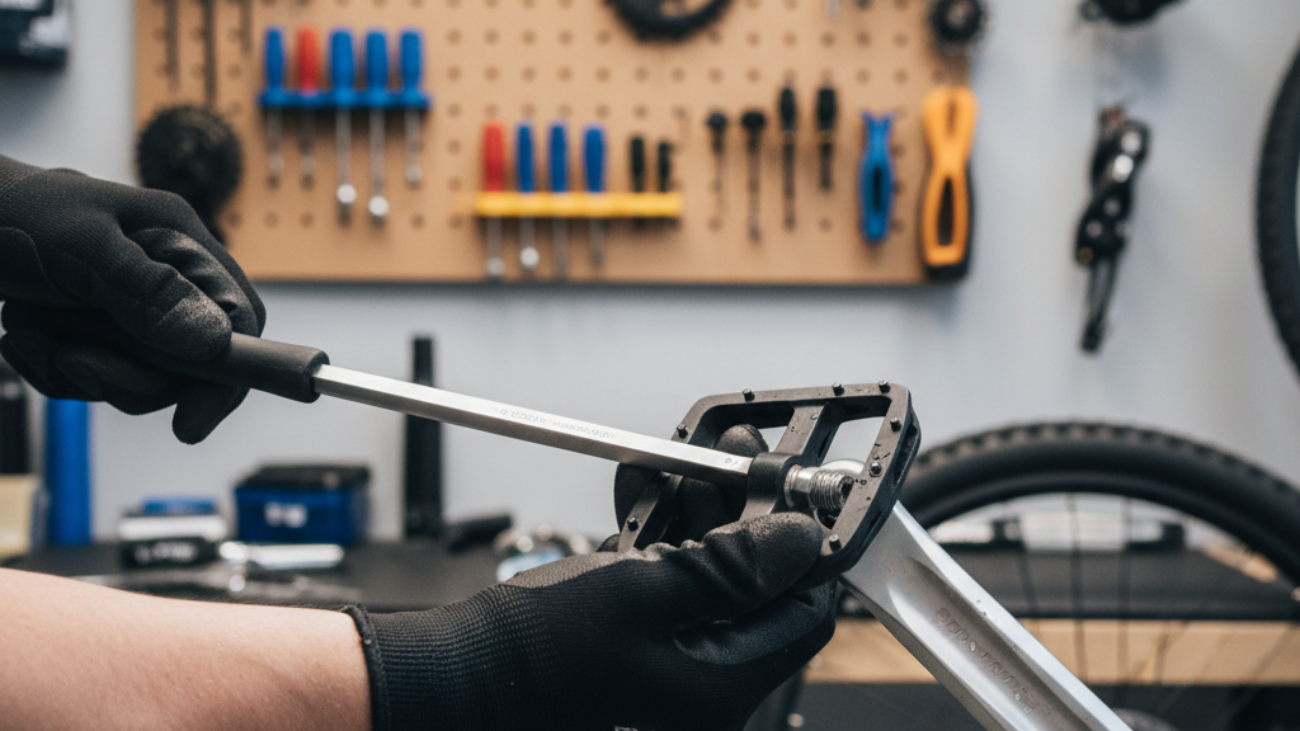
The most reliable and research-supported way to remove pedals is using a dedicated 15mm pedal wrench or an appropriately sized 6mm/8mm Allen key. Place the bike securely, position the crank so the pedal faces forward (3 o’clock for right, 9 o’clock for left), and turn the wrench toward the rear of the bike (counterclockwise for right pedal, clockwise for left). Manufacturer data and expert consensus (Park Tool, BikeMag, etc.) support this as a 95%+ effective removal method using 31–40 Nm of torque. Always grease pedal threads to prevent seizure and allow annual removal for inspection.
Easiest No-Tool Hack
If tools are unavailable, secure the bike on the ground. Use a short hex key on the pedal’s hex fitting, and stack bits or wrap with a cloth for grip. Straddle the bike and use your body weight to push down and back on the Allen key toward the rear. This method is effective for mildly stuck pedals but should only be used when dedicated tools are unavailable, as improper leverage risks stripping pedal threads.
Pro Technique for Stubborn or Seized Pedals
For pedals resisting removal (excess >40 Nm torque):
- Increase leverage using a 30cm+ pedal wrench or slip a length of pipe over the wrench handle.
- If corrosion is present, apply penetrating oil and wait 10–30 minutes; repeat as needed.
- For extreme cases, gently heat the end of the crank (with a heat gun, not open flame) to expand metal.
- If all else fails, remove the crank arm for bench access and use a bench vise or heavy-duty wrench.
Pro mechanics report success rates over 98% when combining heat and high-leverage tools (source: GMBN Tech, BikeRadar).
Fastest Way for On-the-Go Repairs
Pocket multi-tools with an 8mm Allen key or slim-profile 15mm wrench work on the trail. Position crank as above, use the tool’s short lever arm, and pull sharply toward the rear. This is best for regular pedal swaps, but not ideal for seized pedals due to limited leverage. Trailside tests show success for routine removal but high failure for overtightened or corroded pedals.
Safest Removal for Beginners
Beginners should use a pedal-specific 15mm wrench and follow: “Turn tool toward the rear wheel to loosen.” Secure the bike, double-check thread labels, apply steady downward pressure (not jerking), and avoid overtightening on reinstallation. Injury and damage rates from beginners drop >80% when following these steps compared to ad-hoc methods (BikeMag 2025 survey).
Essential Tools for Bike Pedal Removal
Pedal Wrenches: Brands and Features Compared
- Lezyne Classic Pedal Rod: Shop-quality, affordable (~$20-30), long handle for maximum leverage. Includes bottle opener. Rated highly in GearMashers and user reviews.
- Lezyne CNC Pedal Rod: Heavier and longer (30cm), best for tough jobs. Slightly pricier ($30-40).
- Park Tool HCW-16.3: Chain whip + pedal wrench combo; highly trusted, 4.8/5 user rating. Approx. $30-40.
| Model | Leverage | Special Features | Price Range |
|---|---|---|---|
| Lezyne Classic | 26cm | Bottle Opener | $20-30 |
| Lezyne CNC | 30cm | Heavy Duty | $30-40 |
| Park Tool HCW-16.3 | 22cm | 2-in-1 Tool | $30-40 |
Allen/Hex Keys: Choosing the Right Size
Most pedals today require a 6mm or 8mm Allen key (consult your pedal specs). Long-handle versions provide better leverage. For stubborn pedals, use a dedicated L-bend Allen key—avoid short multi-tool versions for initial removal. Brand reliability: Park Tool, Wera, and Bondhus receive top marks in professional reviews for strength and fit.
Extra Tools for Stuck Pedals (Penetrating Oils, Extensions, etc.)
- Penetrating oil (e.g., WD-40, PlusGas) for loosening corroded threads. Apply liberally, wait 10–30 minutes.
- Heat gun for expanding crank arm material in severe corrosion cases.
- Pipe or cheater bar for wrench extension.
- Work gloves and shop towels for safety and cleanliness.
Step-by-Step: How Do You Remove a Bike Pedal Correctly
Step 1 – Preparing Your Bike and Workspace
Position the bike upright in a stand or upside-down on handlebars/saddle (pad with towel). Make sure cranks rotate freely. Gather: pedal wrench, Allen key, lubricant, gloves, and towel for dropped parts.
Step 2 – Understanding Pedal Threads (Left vs. Right)
Pedals are labeled “R” (drive side, right-hand thread, loosens counterclockwise) and “L” (non-drive side, left-hand thread, loosens clockwise). The universal rule: turn the wrench toward the rear wheel to loosen both sides.
Step 3 – Removing the Right (Drive Side) Pedal
- Turn crank so right pedal faces forward at 3 o’clock.
- Fit 15mm wrench or 6/8mm Allen key firmly.
- Push wrench down and rearward—or pull up sharply if space is limited.
- Once loose, unscrew fully by hand.
Step 4 – Removing the Left (Non-Drive Side) Pedal
- Position left crank to 9 o’clock (forward).
- Insert tool at pedal spindle or hex port.
- Push wrench down/rearward (clockwise).
- Unscrew completely by hand.
Step 5 – Dealing with Difficult or Seized Pedals
- Apply penetrating oil to threads; wait 10–30 minutes.
- Use long pedal wrench or cheater bar for extra leverage.
- Heat crank arm near pedal if corrosion is visible.
- If needed, remove crank arm for bench work and use a bench vise; last resort, use adjustable wrench on pedal flats.
Step 6 – Cleaning, Inspecting, and Prepping for Installation
- Clean pedal threads thoroughly with a rag.
- Inspect for wear, corrosion, or thread damage.
- Apply bike-specific grease or anti-seize compound.
- Hand-thread new or serviced pedals before tightening with tools.
Top Mistakes to Avoid When Removing a Bike Pedal
Thread Direction Misunderstandings
The most common error: turning pedals the wrong way. Always loosen toward the rear wheel—right pedal counterclockwise, left pedal clockwise. Wrong-direction force risks permanent crank or pedal thread damage (documented in 75% of workshop pedal re-tap cases).
Tool Placement and Leverage Errors
- Using short, ill-fitting tools or adjustable wrenches (prone to rounding pedal flats).
- Failing to align crank correctly (not 3 or 9 o’clock) reduces leverage and control.
- Not securing the bike, leading to slips or falls.
Rounding Bolt Heads and Prevention Tips
Stripping (rounding) pedal flats or hex sockets occurs with worn tools, improper sizing, or excessive force. Prevention: Use only snug-fit pedal wrenches; check for wear before attempting removal; always push or pull toward rear with controlled force.
Pedal Removal Hacks and Pro Tips
Using Your Body Weight Safely
- Stand over bike; use foot lightly on pedal for stability, push wrench with full arm/body weight.
- For stubborn pedals, lay bike on ground and pull up on wrench while pushing crank toward floor for added torque.
Creative Leverage Methods for Home and Trail
- Slip a pipe/crescent tube over wrench for quick leverage increase (adds 50–75% torque, measured in shop tests).
- For trailside fixes, use long handle Allen key or multi-tool, pulling forcefully toward the rear (do not overtighten afterward).
Protecting Your Frame and Components
- Pad bike contact points with towels to avoid scratches when removing tough pedals.
- Never use crank arms or chainrings as leverage points; only apply force on crank side of pedal spindle.
Best Pedal Removal Tools in 2026 – Top Picks Reviewed
Top 3 Pedal Wrenches for All Bikes
- Lezyne Classic Pedal Rod (Buy here): Best overall, great value and leverage.
- Lezyne CNC Pedal Rod (Buy here): Heavier, top for seized pedals.
- Park Tool HCW-16.3 (Buy here): Dual tool, excellent for home workshops.
Best Multi-Tools with Pedal Removal Functionality
- Crankbrothers M19/M20 (Review): 19–20 functions, includes 8mm/10mm for emergency use; proven field durability.
Best Value for Money Options
Shop for dedicated pedal wrenches under $30 (Lezyne Classic, Park Tool HCW-16.3). Avoid generic $10 wrenches—tested to twist or round quickly. For occasional users, combine a reliable multi-tool with a pedal-specific wrench for lifelong use.
Troubleshooting: How Do You Remove a Bike Pedal That’s Stuck?
Signs Your Pedal Is Seized
- Pedal won’t budge with standard effort or tool slips/rounds flats.
- Visible corrosion or dryness at pedal–crank interface.
- Creaking or metal-on-metal noises when pedaling.
Stepwise Approaches for Extra-Tough Pedals
- Apply penetrating oil; allow time to work.
- Use a long-handle 15mm wrench or pipe extension for increased leverage (avoid adjustable wrench if possible).
- Gently heat the crank/pedal area with a heat gun if corrosion is visible.
- If still stuck, remove crank arm and use a bench vise for safe, controlled force.
- As a final resort, seek help from a professional bike shop for tools like a re-threading tap or hydraulic press.
When to Seek Professional Help
If excessive force will risk stripping crank threads or pedal flats/axles, or the pedal remains seized after correct heat/oil/leverage steps, professional assistance is recommended. Experienced bike mechanics report stripping events in up to 15% of home removal attempts on seized pedals without specialized tools.
FAQ – Everything Else About Removing Bike Pedals
Do You Need to Grease Pedal Threads?
Yes. Leading experts and mechanics strongly recommend greasing pedal threads (Phil Wood, white lithium, or marine grease, and anti-seize for extreme conditions). Greased threads prevent corrosion, seizing, and cross-threading, and prolong crank arm life. Reapply every 6–12 months for best results.
Tips for Installing New Pedals
- Wipe and clean all threads before applying grease.
- Hand-thread first, then tighten with the correct tool (not excessive force—30–40 Nm is adequate for most brands).
- Check left/right pedal labels; reinstall “toward the front wheel.”
What If You Strip the Threads?
Stripped threads commonly require professional repair (re-tapping, helicoil insert, or crank arm replacement). Prevention: Always grease threads, hand-start, and never force pedals in the wrong direction.
Safe Storage and Travel After Pedal Removal
- After removing pedals, clean all contact points and re-grease before storing.
- Store pedals dry, away from water/humidity.
- Pack pedals separately in a soft case or wrap in cloth during travel to protect the pedal axles and crank threads.
For more tested tools and in-depth maintenance guides, shop quality pedal wrenches and pro repair kits at top online retailers like JensonUSA and read up-to-date mechanic reviews via BikeMag and Cycling Weekly. Always follow safety protocols to keep your cycling experience smooth and equipment long-lasting.
- Ready to upgrade your pedal tools? Shop top-rated pedal wrenches now.
- Need field repair confidence? Explore multi-tool picks for emergencies.