
Adjusting the brakes on a bicycle is an essential skill for every rider. Properly set brakes keep you safe and make your ride smoother and more enjoyable. This 2026 guide for rim and disc brakes is designed for grade 9 students and beginners. Follow the step-by-step instructions for success, understand common problems, and learn maintenance tips to keep your bike’s braking system in top shape.
Essential Tools and Safety Gear for Adjusting Bicycle Brakes in 2026
Updated Tool Checklist for Modern Brakes
- Allen keys (usually 4mm, 5mm, and 6mm)
- Cable cutters
- Phillips and flat-head screwdrivers
- Needle-nose pliers
- Torque wrench (for precise tightening)
- Disc brake pad spreader (for disc brakes)
- Hydraulic fluid and bleed kit (for hydraulic disc brakes)
- Clean rags and isopropyl alcohol
- Bike stand (optional, for stability)
Safety Precautions Before You Start
- Always wear gloves and safety glasses to protect yourself.
- Work in a well-lit area with a stable surface.
- Test the brakes gently after each adjustment to avoid accidents.
Must-Have Parts and Supplies
- New brake pads (if replacement is needed)
- Replacement cables or hydraulic hoses (if worn or damaged)
- Bicycle lubricant
- Spare bolts, nuts, and cable anchors for emergencies
Understanding Bicycle Brakes: Rim vs. Disc Explained
Overview of Rim Brakes
Rim brakes work by squeezing brake pads against the wheel rim. They are lightweight and easy to maintain. Common types include V-brakes and caliper brakes.
Modern Mechanical and Hydraulic Disc Brakes
Disc brakes use a metal rotor attached to the wheel hub. Mechanical disc brakes are controlled by cables, while hydraulic disc brakes use fluid for more power and control. Disc brakes offer strong, reliable stopping in all weather.
How to Identify Your Brake Type
- Look at where the brakes grip: on the wheel rim (rim brakes) or on a disc near the hub (disc brakes).
- Check the cables—if there are wires connecting to the brake lever, they are mechanical. Hoses for liquid mean hydraulic brakes.
- Most modern bikes in 2026 have disc brakes, especially mountain and high-end road bikes.
Step-by-Step: How to Adjust Rim Brakes on a Bicycle
1. Preparing Your Bike and Workspace
- Place your bike on a stable surface or bike stand.
- Spin each wheel to check brake function before starting adjustments.
- Gather your tools and keep your workspace organized.
2. Centering and Aligning Rim Brake Pads
- Loosen the brake pad bolts with an Allen key.
- Position pads so they sit flat against the rim without touching the tire.
- Tighten the bolts while making sure pads are level and centered.
- Check that both pads contact the rim at the same time when braking.
3. Adjusting Cable Tension and Lever Feel
- Use a barrel adjuster on the brake lever or caliper to fine-tune cable tension.
- If more adjustment is needed, loosen the cable anchor bolt, pull the cable tighter, and retighten.
- Test the brake lever—it should move halfway before the pads touch the rim and feel firm, not spongy.
4. Pad Wear Indicators and Replacement in 2026
- Inspect brake pads for wear lines or grooves marked by the manufacturer.
- If pads are worn past the line or feel thin, replace them with new ones.
- Follow the previous alignment steps when installing new brake pads.
5. Troubleshooting Common Rim Brake Issues
- Bicycle makes noise when braking: Clean pads and rims with isopropyl alcohol.
- Brakes feel weak: Tighten cable tension or replace worn pads.
- Wheel drags or rubs: Re-center the brake arms and pads.
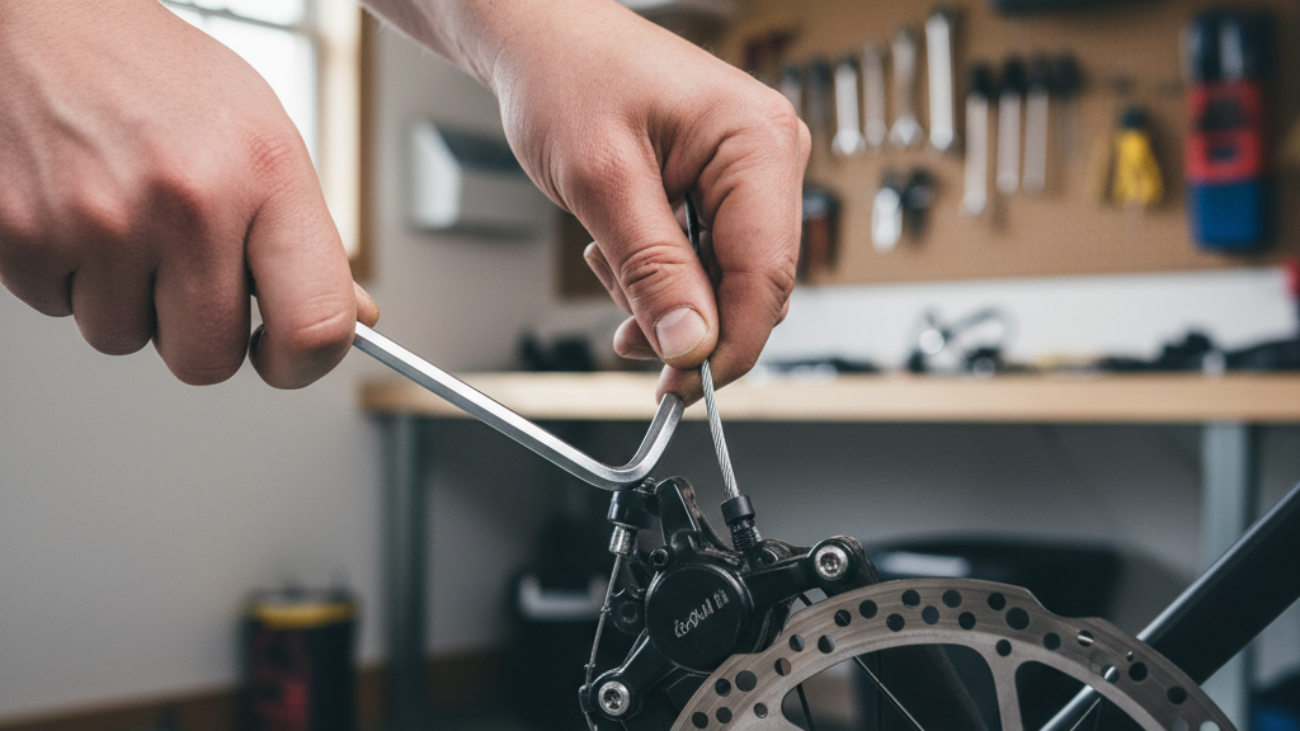
Step-by-Step: How to Adjust Disc Brakes on a Bicycle
1. Mechanical Disc Brake Adjustment Process
- Check pad alignment—loosen caliper bolts and squeeze the brake lever. Pads should center on the rotor.
- While holding the lever, retighten the caliper bolts evenly.
- Fine-tune cable tension using the barrel adjuster for responsive lever feel.
2. Hydraulic Disc Brake Adjustment and Bleeding (2026 Update)
- Check for lever travel and brake power. If brakes feel soft, they may need bleeding.
- Follow your brake manufacturer’s bleed process with a 2026 bleed kit and hydraulic fluid.
- Remove air bubbles and refill with clean fluid for best brake performance.
- Replace worn pads as needed, checking manufacturer’s guidelines for thickness.
3. Aligning Calipers and Rotors for Squeak-Free Performance
- Loosen caliper mounting bolts.
- Squeeze brake lever hard to center caliper on the rotor.
- While holding lever, retighten bolts. Release lever and spin wheel—rotor should run freely between pads.
- If the rotor scrapes, adjust caliper position slightly and check again.
4. Diagnosing and Fixing Disc Brake Problems
- Rotor rub: Re-align caliper, check for bent rotor, and gently straighten if needed.
- Squeaky brakes: Clean pads and rotors with alcohol. Avoid oil or grease on these parts.
- Low braking power: Bleed hydraulics or replace worn pads.
Pro Tips: Avoiding Common Mistakes When Adjusting Bike Brakes
Advanced Troubleshooting for Difficult Cases
- If pads continue to rub, check for wheel or rotor warping.
- For sticky cables, remove, clean, and lubricate them, or replace if damaged.
Mistakes to Avoid with New Brake Technologies
- Never touch disc brake rotors with bare hands—oil leaves residue that causes noise.
- Do not over-tighten bolts—use a torque wrench to prevent damage.
- Replace both pads at the same time for balanced braking.
When to Seek Professional Help
If your brakes do not work after following these steps, visit a bike shop. A mechanic can check for hidden problems like bent levers, damaged rotors, or leaking hydraulic fluid.
Brake Maintenance for Long-Term Bicycle Safety
Cleaning Techniques for 2026 Brake Systems
- Use only isopropyl alcohol or bike-specific cleaners on rotors and pads.
- Clean brake tracks and calipers to prevent dirt buildup.
Inspecting Cables, Hoses, and Brake Pads
- Check cables for frayed wires and sticky movement—replace if needed.
- Inspect hydraulic hoses for cracks or leaks.
- Look for uneven pad wear and replace pads early for best braking.
Seasonal Brake Care Checklist
- Before riding season: inspect and clean all brake parts, adjust tension, replace pads if needed.
- During wet or muddy weather: clean brakes after every ride.
- Before winter storage: dry and lubricate cables, remove moisture to prevent rust.
Frequently Asked Questions: How to Adjust the Brakes on a Bicycle
- How often should I adjust my bicycle brakes? Check your brakes every month and after long or rough rides.
- Why do my brakes squeak? Squeaks are usually caused by dirty pads or rotors or misalignment. Clean and realign as needed.
- Is it safe to ride with worn-out brake pads? No, always replace worn pads to maintain safe stopping power.
- Can I mix old and new brake pads? For best results, replace both pads at the same time.
Resources and Further Reading on Bicycle Brake Adjustment (2026 Edition)
- Manufacturer websites and brake manuals
- 2026 online video tutorials for rim and disc brakes
- Bicycle maintenance books and e-guides
- Local bicycle shops and cycling clubs