
Learning how do you remove a bike pedal is a valuable skill for any cyclist. Whether you want to replace worn pedals, upgrade to a new style, or perform maintenance, knowing the process can save time and money. This guide is designed for grade 9 students, using simple language and clear, numbered steps. You will also learn about the right tools, important safety tips, and solutions for common problems. By the end, you’ll have full confidence in removing bike pedals yourself.
Essential Tools Needed to Remove a Bike Pedal
Before starting, gather the right tools. The right equipment makes removing a bike pedal fast and easy.
Standard Bike Pedal Wrench vs. Adjustable Wrench
- Bike Pedal Wrench: Specially designed for pedals. It is thin and fits easily into tight spaces between the pedal and the crank arm.
- Adjustable Wrench: Useful if you do not have a pedal wrench. Make sure it is not too bulky, or it may not fit.
Preparing Your Workspace for Pedal Removal
- Find a flat surface to work. This helps you keep the bike stable.
- Lay down a cloth or mat. It protects the floor and parts.
- Keep tools close by and organized.
- If possible, use a bike stand to hold the bike. This keeps it steady and easier to access both pedals.
Understanding Bike Pedal Threads and Orientation
Knowing how pedal threads work is important. Using force in the wrong direction can damage the parts.
Right vs. Left Pedal: Key Differences
- The right pedal (drive side) tightens clockwise and loosens counterclockwise.
- The left pedal (non-drive side) tightens counterclockwise and loosens clockwise.
- This is called a reverse or left-hand thread on the left pedal. It prevents the pedal from loosening while you ride.
How to Identify Pedal Side and Thread Direction
- Stand next to your bike and face it from the right side (where the chain is).
- The right pedal is on your side; the left pedal is on the other side.
- Look for letters ‘R’ or ‘L’ stamped on the pedal axle or end. ‘R’ means right, ‘L’ means left.
How Do You Remove a Bike Pedal: Step-by-Step Instructions
The process is simple if you follow each step carefully.
1. Positioning the Bike Safely for Pedal Removal
- Put the bike on a stand or lean it against a wall.
- Shift the chain onto the largest chainring. This protects your knuckles if the wrench slips.
- Wear gloves to avoid cuts or grease stains.
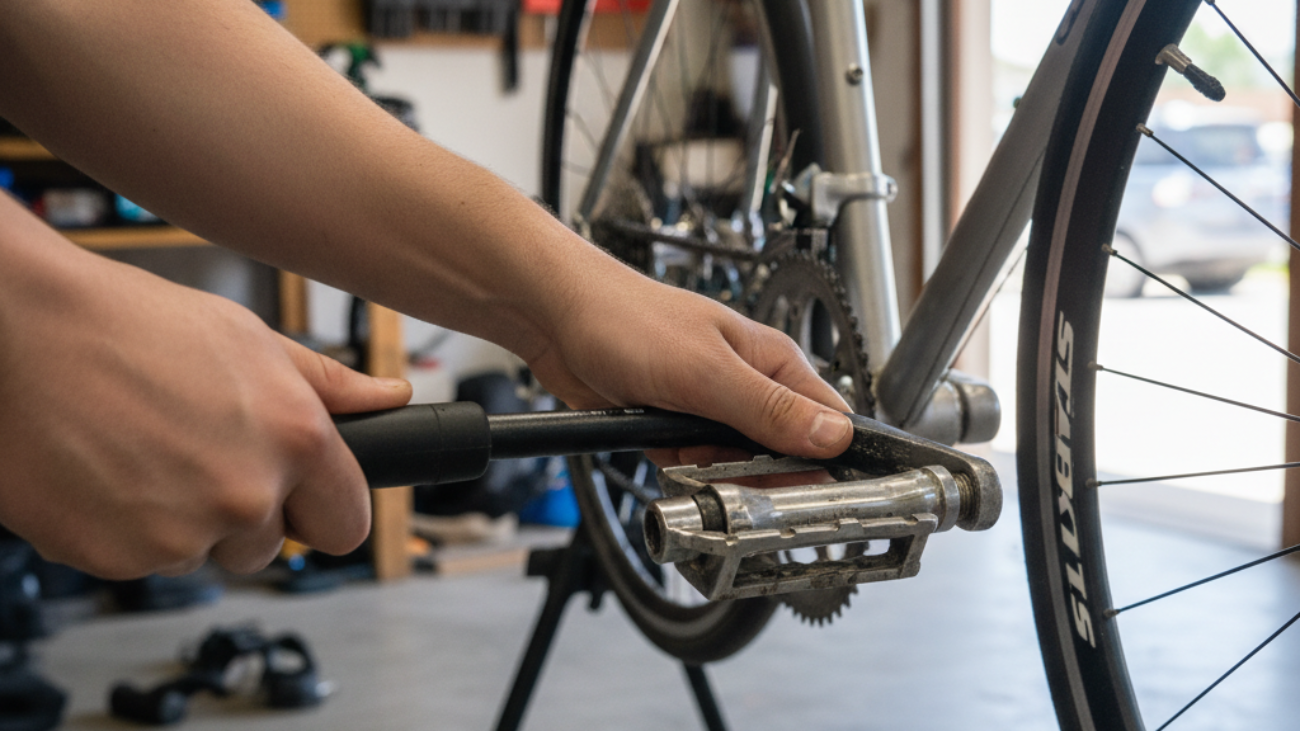
2. Loosening the Right (Drive Side) Pedal
- Place the pedal wrench or adjustable wrench onto the flat part of the pedal axle next to the crank arm.
- Turn the wrench counterclockwise (towards the back of the bike) to loosen.
- If it is hard to turn, gently tap the wrench with your hand or use your foot for more power.
- Once loose, unscrew the pedal the rest of the way by hand.
3. Removing the Left (Non-Drive Side) Pedal
- Move to the left side of the bike.
- Place the wrench onto the left pedal’s axle.
- Turn the wrench clockwise (again, towards the back of the bike) to loosen the left pedal. Remember, this is the opposite of the right pedal.
- Once loose, finish unscrewing by hand and set the pedal aside.
4. Tips for Stubborn or Stuck Pedals
- If a pedal will not budge, spray a little lubricant (like WD-40) around the threads.
- Let it sit for a few minutes before trying again.
- Use a longer wrench for extra leverage, but be gentle to avoid stripping the threads.
- Rock the pedal gently back and forth to break rust or dirt.
Troubleshooting Common Pedal Removal Problems
Dealing with Rusted or Seized Pedals
- Apply penetrating oil to the joint between pedal and crank arm.
- Let it soak for 10-15 minutes.
- Use a pedal wrench and try again.
- If needed, tap the wrench with a rubber mallet.
What to Do When Pedal Threads Are Stripped
- If the pedal axle spins but does not loosen, the threads may be stripped.
- Stop and remove the crank arm for repair.
- Visit a bike shop for help. Sometimes, special tools or parts like a thread insert are needed.
Alternative Methods and Tool Substitutes
- If you don’t have a pedal wrench, use a 15mm open-end wrench. Make sure it fits tightly for good grip.
- Adjustable wrenches work but be careful – they can slip and damage the pedal or crank arm.
- For hard-to-reach pedals, take off the crank arm with a crank puller and then remove the pedal.
Expert Maintenance Tips After Pedal Removal
Cleaning and Inspecting Crank Arms
- After removing the pedals, wipe down the crank arms with a rag.
- Check for cracks or damage in the crank arm, especially around the threads.
- Remove any dirt or old grease before reinstalling pedals.
Greasing Pedal Threads for Reinstallation
- Apply a thin layer of bike grease to the pedal threads. This makes future removal easy and prevents rust.
- Do not use too much grease; a little goes a long way.
When to Replace Pedals or Threads
- Replace pedals if they spin roughly, the bearings are noisy, or the platforms are cracked.
- If the crank arm threads are damaged, use a thread repair kit or replace the crank arm.
How Do You Remove a Bike Pedal: Safety and Pro Tips
Avoiding Common Mistakes in Pedal Removal
- Always remember left pedal loosens clockwise, right pedal loosens counterclockwise.
- Use the correct tool to avoid injuries and damage.
- Do not force a stuck pedal too hard – use patience and lubricant first.
Recommended Frequency for Pedal Maintenance
- Check and remove pedals at least once per year, more if you ride in wet or muddy conditions.
- Regular maintenance prevents the pedals from seizing due to rust or dirt.
FAQ: How Do You Remove a Bike Pedal and Related Questions
- Can I remove a bike pedal without special tools?
Yes, but a pedal wrench or proper-sized spanner makes the job much easier and safer. - How do I know if I’m turning the pedal the right way?
Remember: The right pedal loosens left (counterclockwise), the left pedal loosens right (clockwise). - What if my pedal won’t budge?
Use lubricant, add leverage, or ask for help at your local bike shop. - Is it okay to reinstall old pedals?
If the threads and bearings are in good shape, yes. Always grease the threads before reinstallation. - How tight should pedals be when reinstalling?
Snug, but do not over-tighten. Hand tight, then a final firm turn with a wrench is enough.
In summary, knowing how do you remove a bike pedal means you can keep your bike in great shape and save money on repairs. Gather the right tools, understand pedal direction, and follow each step carefully. Remember to clean and grease the threads before reinstalling or replacing your pedals. If you have trouble, try the troubleshooting tips or ask a professional. With regular checks and care, your pedals will come off smoothly every time.