
Removing bike pedals might seem tricky, especially for beginners. However, with the right guide, anyone can remove bike pedals quickly and safely. This comprehensive tutorial explains how do you remove bike pedals step by step, including tool requirements, common problems, expert tips, and mistakes to avoid. Whether you’re fixing, upgrading, or transporting your bike, this guide makes the process clear and straightforward.
Essential Tools & Preparation for Removing Bike Pedals
Tools Required for Pedal Removal
- 15mm pedal wrench (or suitable Allen/hex key, usually 6mm or 8mm depending on the pedal)
- Gloves for hand protection
- Bike stand (optional, but makes the job easier)
- Degreaser or cleaning rag
- Bicycle grease (for reinstalling pedals)
- Penetrating oil (for stubborn pedals)
Safety Precautions and Workspace Setup
- Work in a well-lit, stable area to avoid slips.
- Wear gloves to protect your knuckles from injury.
- If using a bike stand, secure the bike so it does not move.
- Keep your workspace free of clutter to avoid accidents.
- Lay out all your tools within arm’s reach before starting.
Understanding Bike Pedals: Types and Orientation
Identifying Right vs. Left Pedal Threads
Bikes have a right and a left pedal. The right pedal (on the chain side) has a standard thread and tightens clockwise. The left pedal (non-chain side) has a reverse, or left-hand, thread and tightens counterclockwise. This design prevents pedals from loosening while riding. Look for ‘R’ or ‘L’ markings on the pedals or spindles to identify each side. Remember: right pedal = clockwise, left pedal = counterclockwise.
Common Pedal Types and Materials
- Standard platform pedals (flat, used on most city or mountain bikes, usually metal or plastic)
- Clipless pedals (require special shoes to clip in, common for road or mountain biking, often metal)
- Cage or toe-clip pedals (have a cage to keep your foot in place)
- Materials include aluminum, steel, plastic, or composite combinations depending on the bike type and use.
Step-By-Step Instructions: How Do You Remove Bike Pedals
Quick Guide (With Photos/Diagrams)
- Position your bike upright and make sure it’s stable.
- Identify the left and right pedal using markings.
- Choose the correct tool (pedal wrench or hex key).
- Line up the wrench or hex key on the pedal axle.
- Turn counterclockwise to remove the right pedal, clockwise to remove the left pedal.
- If stuck, use extra leverage or penetrating oil.
(Tip: Refer to your bike’s manual or online tutorials for diagrams or images for each step.)
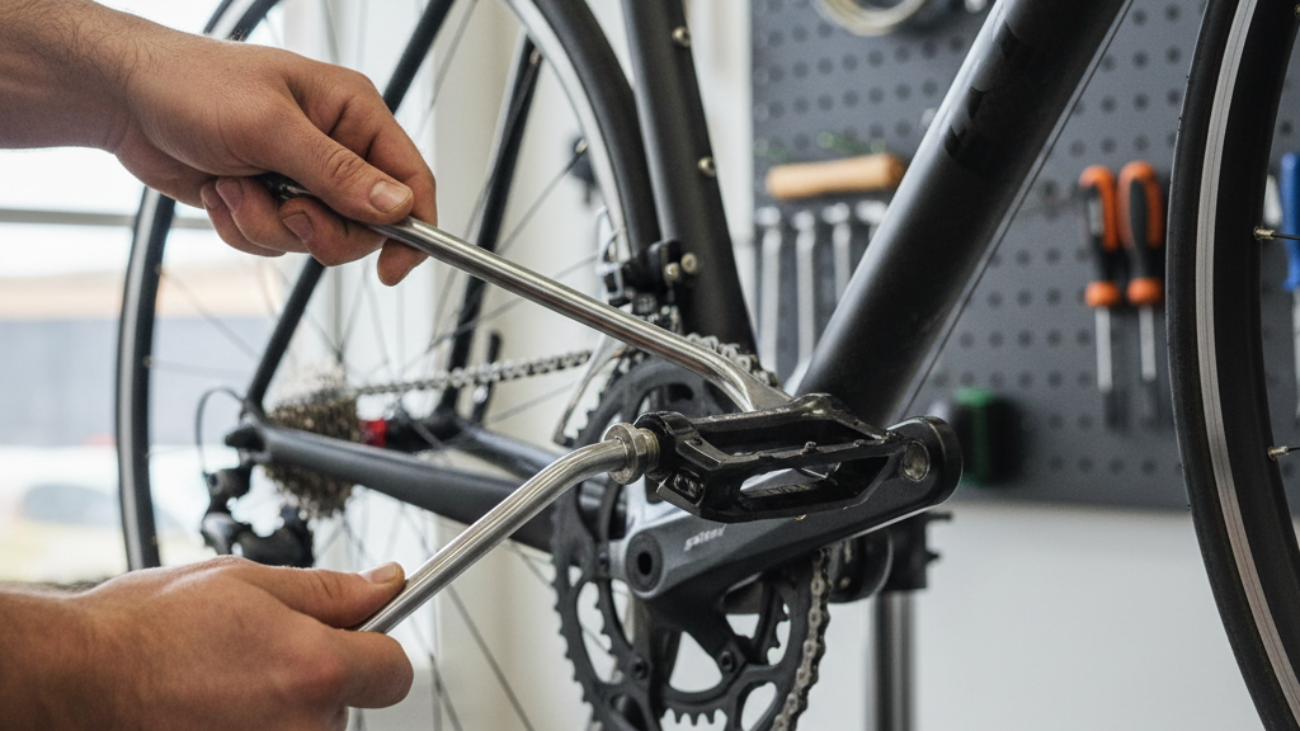
Removing Standard Platform Pedals
- Rotate the bike’s crank arm so the pedal is easy to access.
- Place the pedal wrench on the spindle, close to the crank arm.
- Press firmly and rotate the wrench: right side = counterclockwise, left side = clockwise.
- Continue turning until the pedal unscrews completely.
- Wipe the spindle clean after removal.
Removing Clipless and Specialty Pedals
- Locate the Allen key socket on the pedal spindle (often on the inside of the crank arm).
- Insert the correct size Allen key and turn as above (right = counterclockwise, left = clockwise).
- If the pedal is very tight, use a cheater bar (pipe for extra leverage) carefully.
- Pull the pedal off and clean the threads.
Troubleshooting Stuck or Difficult Bike Pedals
Common Reasons Pedals Get Stuck
- Pedals have not been removed or greased for a long time.
- Corrosion or dirt buildup on pedal threads.
- Over-tightening during installation.
Expert Tips for Extra Stubborn Pedals
- Apply penetrating oil to the pedal threads and let it soak for 10-20 minutes.
- Use a longer wrench for more leverage, but be careful not to strip the threads.
- Tap gently on the wrench handle with a rubber mallet to break loose corrosion.
- Secure the crank arm with your other hand to avoid bending it.
- If still stuck, visit a bike shop for professional help to avoid damage.
Mistakes to Avoid When You Remove Bike Pedals
- Forgetting left and right pedal thread directions (risk of damaged threads).
- Using the wrong tool or forcing the pedal (may strip the spindle or crank arm).
- Not securing the bike, leading to injuries or damaged components.
- Ignoring safety gear – gloves and eye protection are important.
- Neglecting to clean and grease threads before reinstalling (causes future problems).
Replacing and Reinstalling Your Bike Pedals Correctly
Applying Grease and Proper Torque
- Clean pedal threads with a rag before installation.
- Apply a thin layer of bike grease to the pedal threads to prevent rust and sticking.
- Thread pedals in by hand first to avoid cross-threading.
- Tighten with a wrench, using moderate force (about 30-35 Nm is recommended).
Positioning for Comfort and Performance
- Install pedals so the widest part is level with the horizon when cranks are horizontal.
- Test ride and adjust pedal angle as needed for foot comfort and joint safety.
- For clipless pedals, set spring tension for easy entry and exit if you’re new to the system.
- Check the security of the pedals after your first ride.
FAQs: How Do You Remove Bike Pedals and Related Questions
- Can I remove bike pedals without a pedal wrench?
Yes, if your pedals use Allen keys. If not, a thin 15mm wrench is needed. - How often should I remove or check my pedals?
At least once a year for cleaning and greasing, or if you hear creaks. - Why do my pedals squeak after reinstalling?
Lack of grease or overtightening are common causes. Remove, grease, and reinstall. - Can stuck pedals damage my bike?
Forcing can damage the crank arm. Use proper technique or get shop help. - Are all bike pedals universal?
No. Make sure thread size and pedal type match your crank arms before replacing.
Visual Aids: Step-by-Step Images and Video Tutorials (2026)
- Search for “How to remove bike pedals” on YouTube for helpful visual guides alongside your reading.
- Refer to manufacturer’s websites for diagrams of your specific pedal model.
- Many bike shops offer beginner classes or demo videos for further help.
Summary: Removing bike pedals isn’t difficult if you follow the right steps and use proper tools. Always identify pedal threads, use a suitable wrench or Allen key, and remember righty-tighty, lefty-loosey (except for the left pedal). Safety first, and don’t skip greasing! With practice, you’ll quickly and confidently remove and reinstall bike pedals, whether maintaining your current bike or upgrading your ride. For more details, check out visual guides and FAQs, and consult your local bike expert if in doubt.